Hands-On Robotics with Arduino, Build 13 robot projects

- Description
- Curriculum
- FAQ
- Reviews
Curious about controlling a Robot with smartphone, you have come to the right place. Learn the basic concept and programming required to design a fully functional Arduino Robot. For this course you will need the simplest but the most powerful and advanced Micro-Controller board called the Arduino UNO and a Bluetooth along with some basic electronics component.
Fundamentals of Robotics
Robotics is fundamentally a branch of technology that deals with the design, construction, operation, and application of robots. It is a powerful tool to understand the basic concepts of Computer Science, Mechanical engineering, and Electronics engineering. In this Arduino robot course will use a simplified version of C++ language for programming our Robot using the Arduino IDE.
Course Content and Overview
This course is designed for students interested in controlling an Arduino Robot with Android Smartphone. No coding experience is required; all you need is an Arduino, Bluetooth, some low cost hardware and electronics component for building the Robot. We will start from basics of Arduino programming and then move to higher topics.
Basics of Arduino
In this course you will first understand the basics of Arduino and then we will look at Arduino installation & setting up Arduino with your Computer or Laptop
Construction of Robot
After understanding the basics of Arduino next we will construct our Arduino Robot. All the components required for building this Robot are mentioned in Section 2
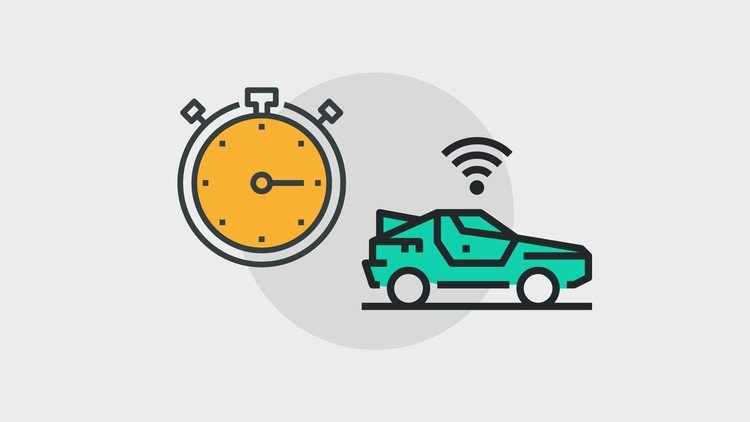
Time Control Robot
In the Time Control Robot section you will first understand the working of Motors Driver and how to control 2 motors using a single motor driver.
We will then write Arduino program so that the Robot moves in the following direction for a specific period of time
-
Forward
-
Backward
-
Axial Left
-
Axial Right
-
Radial Right
-
Radial Left
-
Stop
Serial Communication
Serial Communication is essential for sending and receiving data between Electronic hardware devices. We will use Serial Communication to control Led’s, Potentiometer sensor and the Arduino Robot.
In this section you will learn to read analog values from sensors and display it on the Serial Monitor. You will also write (send data) values from PC to Arduino.
Android Programming
Android OS has taken the world by storm after its inception nearly 10 years back. One of the major benefits of owning an Android smartphone is the ability to use it as a Remote Control for controlling Robots and other Electronics devices.
In this course we will design 5 Android Applications using a tool called AppInventor2. AppInventor2 is a Graphical Programming Software using which even a non programmer can design amazing Android apps in a matter of minutes.
Controlling Arduino Robot using Android Smartphone
We will create 3 android applications for controlling the Arduino and each application works in different manner
SmartBot
In the Smartbot android app we will create 5 buttons (Forward, Backward, Left, Right and Stop). When the user clicks on any of the button the Robot will move in that particular direction.
AcceleroControl Robot
In the AcceleroControl Robot android app, we will use the accelerometer sensor from the android smartphone to control the Robot. So when the user tilts the robot in forward direction it will will move forward, when the Smartphone is kept flat the Robot will Stop. Similarly by pointing the smartphone in direction you can control the direction of the Arduino Robot.
VoiceControl Robot
In the Voice Control Robot we will move our Robot in different direction by giving voice inputs
Black Line Follower
In Black line follower robot, we will first understand the working principal of the IR sensor and then attach it to our robot. After this we will understand the programming logic and then program the arduino robot to follow a black line.
White Line Follower
In white line follower, we will first understand the working principal of White line follower robot and then we will reverse the black line follower program so that the arduino robot follows a white line
Object Follower Robot
In Object Follower robot, we will first understand the working principal of this robot. After this we will write the Object Follower robot program so that the arduino robot can follow an Object.
Object Repeller Robot
In Object Repeller robot, we will first understand the working principal of this robot. After this we will write the program so that arduino robot keeps repelling or keeps moving away from the object.
Object Avoider Robot
Object avoider robot is similar to object repeller robot, but in certain condition, it will simply avoid the object instead of moving away from it.
Light Follower Robot
In Light Follower robot, we will first understand the working principal of this robot. After this we will write the Light Follower robot program and use the smartphone’s flash light so that the arduino robot can follow it.
Light Repeller Robot
In Light Repeller robot, we will first understand the working principal of this robot. After this we will write the program so that arduino robot keeps repelling or keeps moving away from a light source.
Light Avoider Robot
Light avoider robot is similar to light repeller robot, but in certain condition, it will simply avoid the object instead of moving away from it.
-
1
 Introduction to Course Content
 -
2
Introduction to Arduino Micro controller Board
In this video you will learn the basics of Arduino UNO MicroController Board.
-
3
How to install the Arduino Integrated Development Environment(IDE)
In this video I will show you how to install the Arduino IDE inside a Windows systems.
-
4
Setting up the Arduino IDE
Setting up the IDE is easy but it can become a tedious task if you dont know how to set it up. In this video I will teach you step by step on how to setup the Arduino UNO board with the Arduino IDE
-
5
How to blink an Arduino LED
Time to write some code. In this video I will introduce you to the basics of Arduino programming. We will write a very simple program to blink the Arduino on-board LED
-
6
 Section End Quiz
So after understanding the basics of Arduino, lets have a short quiz
-
7
How to choose a good Robot Chassis
In this video I explain you what's a Robot Chassis and how you can choose a Good Robot chassis for building your Robot
-
8
Parts required for building a Robot
After choosing a good Robot chassis, it's now time to look at all the parts that you will require for building the Robot
-
9
CONSTRUCTION OF ROBOT
Finally its Time to construct our Time Control Robot
-
10
Introduction to Motor Driver, How to choose a good Motor Driver?
Motor Driver is a circuit that is use for Controlling the Motors. An arduino cannot provide the necessary Voltage required for running the Motors. So we first connect the Motor driver to Arduino and then power motors using Motor Driver
-
11
How a Motor Driver works? Detailed Explanation with H Bridge circuit
The Motor Driver breakout board consist of two H-Bridge which are required for running the Motors. One H-Bridge circuit control one Motor at a time. So in this video you will understand What is an H Bridge?and the working of H bridge
-
12
Wiring connections between Arduino and Motor Driver
In this video we will look at the wiring connections between Arduino, Motor Driver and DC Motors.
-
13
Section End Quiz
Quiz on Robot construction and Motor Driver
-
14
Time Control Robot - Forward Program
Finally we write the first piece of code for moving our Time Control Robot. In this video we will only the program for the Robot in Forward direction. But after finishing the code do not upload the code inside the Arduino because you will get 3 different types of Output. What are the 3 different types? Check them in the next video
-
15
Time Control Robot - Forward Program Output Logic
In the previous video we have written the program for moving the Robot Forward. But if you are wiring connections are not proper then you will not the desired output. Check this video to understand these 3 different outputs and make wiring changes between Arduino, Motor Driver and DC Motors
-
16
Time Control Robot - Backward Program
After moving the Robot Forward for 2 sec, its now time to move it Backward for 2 sec
-
17
What are the different types of turn a robot can take
A two wheel robot can take two types of turn
- AXIAL TURN
- RADIAL TURN
Understand the basic difference between the Axial & Radial turn.
-
18
Time Control Robot - Axial Turns
In this video we will write the code for taking Axial Left turn and Axial Right turn
-
19
Time Control Robot - Radial Turns Program
In this video we will write the code for taking Radial Left turn and Radial Right turn
-
20
Time Control Robot - Stop the Robot
After moving the Robot in 6 different direction its now time to Stop our Robot. So in this video we will write the programming logic for stopping the Robot.
-
21
Time Control Robot - Permanently Stop the Robot
In the previous video we have written the program to STOP the Robot, but the Robot Stopped only for 5 seconds so in this video I will explain you two things with single piece of code.
- How to permanently stop a Robot?
- How to execute an arduino program only once?
-
22
Time Control Robot - Functions and Infinity in Arduino
In this video you will learn how to use functions in Arduino ? Next we will stop the Robot permanently using the Infinity command
-
23
Section End Quiz
-
46
What is an Accelerometer Sensor? How it works?
-
47
How to read X, Y and Z axis with the accelerometer sensor?
-
48
How to plot the X, Y and Z axis from the accelerometer sensor?
-
49
AceleroControl Robot - User Interface of Android App
-
50
AceleroControl Robot - Graphical program of Android App
-
51
AceleroControl Robot - Arduino Program
-
52
AceleroControl Robot Output Video